
Equipment required for today's lab:
2 amp measuring devices
2 sets of alligator clips
This stuff will allow us to get a good measure on what a transistor is good for!

Just a few old friends of ours:
Some resistors
A potentiometer
An LED
And two new ones!
A micro switch (push button)
A 2N3904 transistor
Here's a quick summary of what this transistor does!
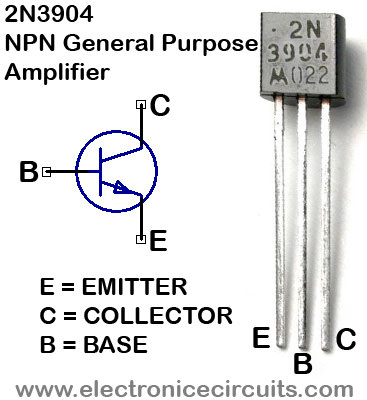
By sending electricity to B(ase), it allows the connection from C(ollector) to E(mitter). It functions similar to a push button, without the physical switch part.
Putting these into a circuit that controls the LED produces the result shown in the video below:

Now for some fun science! Using my finger in place of the push button and resistor connected to the base, it can produce the same effect, allowing the power supply electricity to power the LED!


And here it is in video form!
Getting a little more data driven here, connecting some potentiometers in place of resistors allows us to adjust the amount of electricity going through in real time! This is perfect for checking the output of each twist on the "screw" on each POT.


It might be a little hard to tell, but the readings/data reveal that from the original amp number of 0.01 mA put in the first checkpoint (before the transistor) it was multiplied to approximately 2.00. That's a 200 time increase in current!
No comments:
Post a Comment